Automated Code to URL on Kubernetes using Cloud Native Buildpacks, Knative and ArgoCD
Boskey Savla
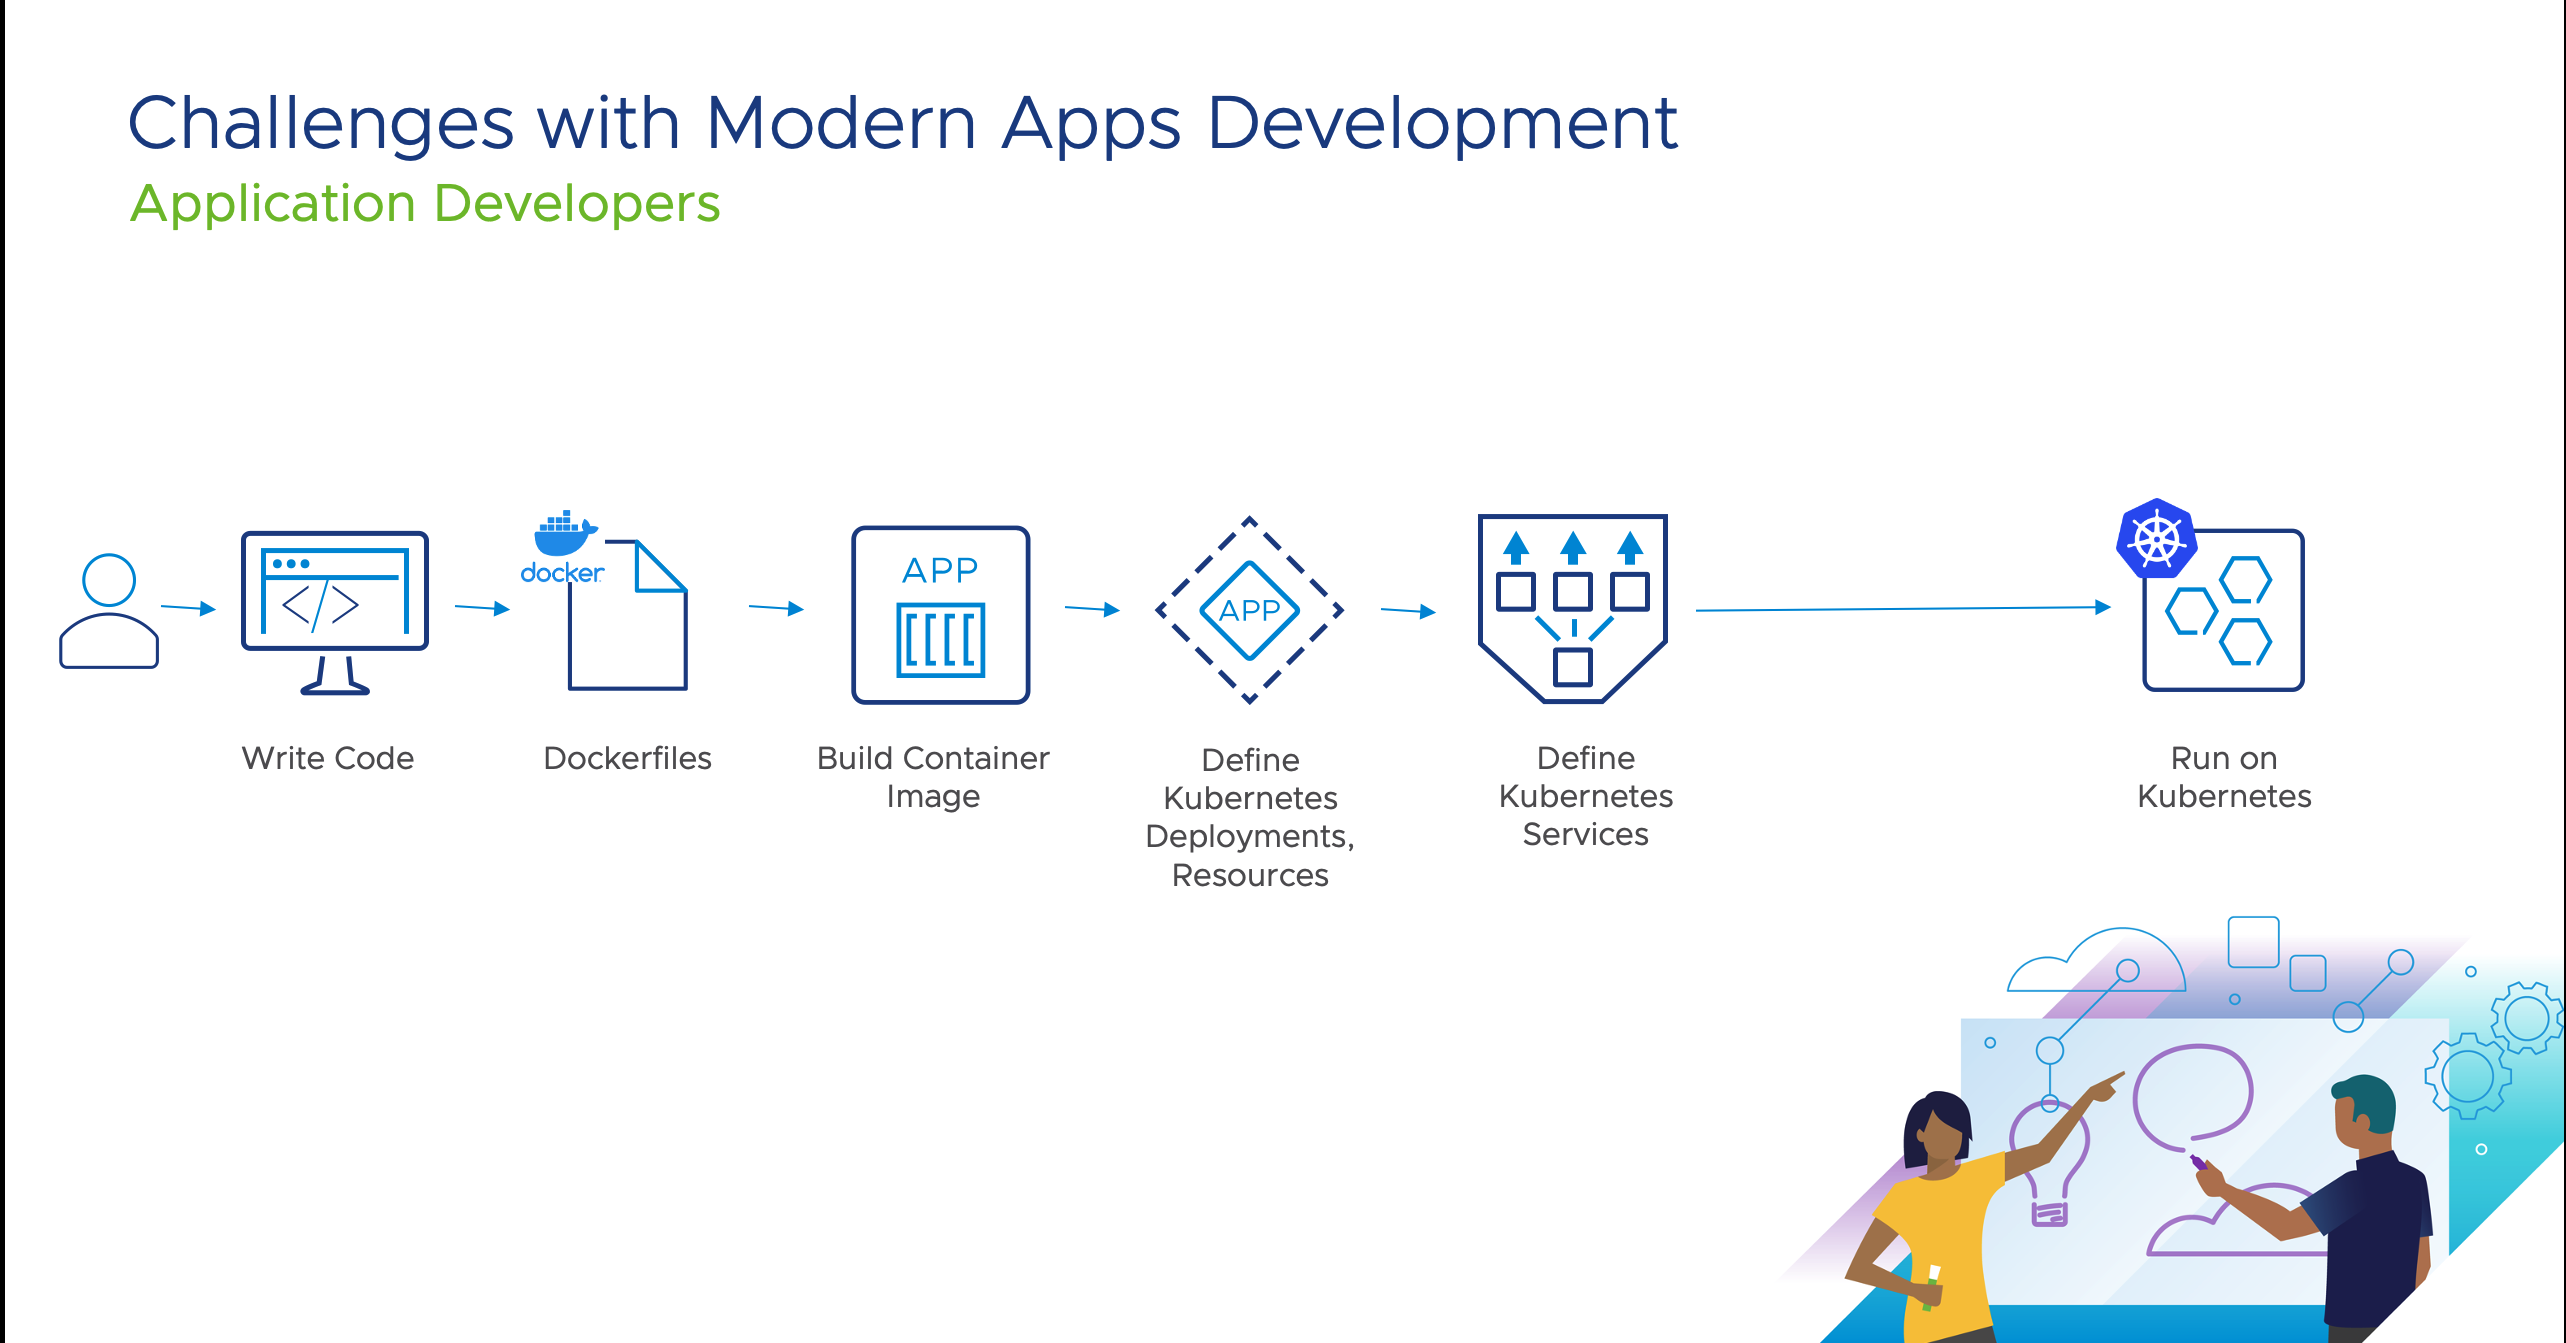
Technologies like Docker and Kubernetes simplify the process of building, running and maintaining cloud native applications. At the same time taking source code, building it into a container image and turning it into a deployed application on Kubernetes can be a time consuming process. A large part of the process can be automated with Continuous Integration Systems (CI) and Continuous Deployment(CD) Systems. However there are stages in the build and deployment phases that still need to be defined manually. Most CI systems aren’t application aware. They cannot build automated Docker images from source code unless explicitly defined in a spec file like Dockerfiles or a config file that a CI system can understand. Due to which, Apart from writing application code, you also need to manually define and test Dockerfiles or config files to convert source code into an executable container image. When deploying the image onto Kubernetes, you need to then define various Kubernetes constructs needed to run the application. Like Deployments, StatefulSets, Services, Ingress etc. This process can add errors, security gaps and overhead.
In this Guide we are going to show how to automate building of Container Images and buildout of Kubernetes Resources using Cloud Native Buildpacks and Knative respectively. We will also demonstrate how this can process can be further optimized using GitOps style practices via ArgoCD. We will work with a sample application based on Spring and run the application on Kubernetes with an addressable URL. We will use:
-
Cloud Native Buildpacks to automate Container Image build process. Cloud Native Buildpacks is a specification that defines how OCI compliant containers can be build, removing the need to specify or build
Dockerfiles. They can automatically detect the language an application is written in and determine the best and most secure way to package applications in a container image. Cloud Native Buildpacks can also be used to update container images easily for any changes. For this guide we will use an implementation of Cloud Native Buildpacks called kpack. kpack lets you use deploy Cloud Native Buildpacks on a Kubernetes Cluster. (See What are Cloud Native Buildpacks? for more on Cloud Native Buildpacks, and kpack.) -
Knative to automatically generate an Ingress Service with URL and other Kubernetes Resources for the container image that was built using Cloud Native Buildpacks. Knative Serving automates the process of creating Kubernetes objects needed for an application like Deployment, Replicasets, Services etc., eliminating the need to write complex Kubernetes YAML files.
-
ArgoCD to automate deployment pipeline pushing container images on to Kubernetes using Knative. ArgoCD helps deploy application continuously using GitOps methodology. It can take specifications like Kubernetes resources, Knative, Kustomize etc. to deploy application on Kubernetes.
-
A sample application called Petclinic that is based on Spring
-
Kind as a local Kubernetes Cluster
In summary, our overall workflow will be to take the sample application in Spring, use Cloud Native Buildpacks/kpack to convert source code into a container image, use Knative Serving to create a deployment using ArgoCD. This process will eliminate the need to write Dockerfiles or any Kubernetes resource YAML files.
Assumptions and prerequisites
There are a few things you will need before getting started
-
You have kubectl, a tool to interact with Kubernetes Cluster installed.
-
Docker Desktop is installed on your laptop/machine with at least 4 GB of memory and 4 CPU’s allocated to Docker Resources.
-
You have access to Docker Hub Repository to store container images.
-
You have an account in Github to clone the app Petclinic
1. Prepare a Kubernetes Cluster and clone Sample Application
We will deploy a Kind cluster using Docker Desktop and install Contour on it to help provide Ingress management. Contour along with Envoy Proxy will help create service and URL management for Knative.
brew install kind
Create a Kubernetes Cluster called tdp-guide and set Kubectl context to tdp-guide
kind create cluster --name tdp-guide
kubectl cluster-info --context kind-tdp-guide
Log onto Github and Fork the repository for our sample app Petclinic
2. Install Knative Serving
kubectl apply -f https://github.com/knative/serving/releases/download/v0.22.0/serving-crds.yaml
kubectl apply -f https://github.com/knative/serving/releases/download/v0.22.0/serving-core.yaml
3. Install Contour Ingress Controller
kubectl apply -f https://github.com/knative/net-contour/releases/download/v0.22.0/contour.yaml
kubectl apply -f https://github.com/knative/net-contour/releases/download/v0.22.0/net-contour.yaml
Change Knative Serving config to use Contour Ingress
kubectl patch configmap/config-network \
  --namespace knative-serving \
  --type merge \
  --patch '{"data":{"ingress.class":"contour.ingress.networking.knative.dev"}}'
4. Install and Configure Cloud Native Buildpack using kpack
kubectl apply -f https://github.com/pivotal/kpack/releases/download/v0.2.2/release-0.2.2.yaml
Cloud Native Buildpacks will need a Repository to Store container images that it will be building. This could be any OCI compliant repository, for this guide we will use Docker Hub. You can easily create and account in Docker Hub if you don’t have one.
We need to create a Docker Hub account credentials secret in Kubernetes. Use the below command and change the docker-username to the your repo name in Docker Hub. Change the docker-password to your account password.
kubectl create secret docker-registry tutorial-registry-credentials \
    --docker-username=abc \
    --docker-password=********* \
    --docker-server=https://index.docker.io/v1/\
    --namespace default
Cloud Native Buildpacks create Container images using a builder that uses a predefined stack of container image layers. You can define custom stack, store and builders. For this guide, we are using standard definitions.
kubectl apply -f https://raw.githubusercontent.com/Boskey/spring-petclinic/main/kpack-config/sa.yaml
kubectl apply -f https://raw.githubusercontent.com/Boskey/spring-petclinic/main/kpack-config/store.yaml
kubectl apply -f https://raw.githubusercontent.com/Boskey/spring-petclinic/main/kpack-config/stack.yaml
kubectl apply -f https://raw.githubusercontent.com/Boskey/spring-petclinic/main/kpack-config/builder.yaml
5. Install and Configure ArgoCD
kubectl create namespace argocd
kubectl apply -n argocd -f https://raw.githubusercontent.com/argoproj/argo-cd/stable/manifests/install.yaml
Install ArgoCD CLI
brew install argocd
Since ArgoCD is installed on a Kind cluster, it does not have a Kubernetes Load Balancing Service type to expose the ArgoCD service. We will manually expose the ArgoCD service using port-forward
On a new Terminal,
kubectl port-forward svc/argocd-server -n argocd 8080:443
Fetch ArgoCD credentials to login via CLI
kubectl -n argocd get secret argocd-initial-admin-secret -o jsonpath="{.data.password}" | base64 -d
Copy the output of the above command, that is the admin password for ArgoCD
Login to ArgoCD
argocd login localhost:8080
username: admin
password: <copy-paste from the command above>
We have now installed Knative Serving, Cloud Native Buildpacks and ArgoCD. Its time to implement a workflow that will take our source code and convert it into a URL.
6. Build Container Image using Cloud Native Buildpacks
We will be using the Petclinic app, the file petclinic-image-build.yaml tells kpack where the source code is via the spec.source.git.url , where to upload and what tag to use for the final container image using spec.tag.
Copy this file and change the spec.tag to your <docker-repo>/<app-name> and change the spec.source.git.url to your Git Repo for Petclinic you forked in Step 1
apiVersion: kpack.io/v1alpha1
kind: Image
metadata:
  name: petclinic-image
  namespace: default
spec:
  tag: boskey/app
  serviceAccount: tutorial-service-account
  builder:
    name: my-builder
    kind: Builder
  source:
    git:
      url: https://github.com/spring-projects/spring-petclinic
      revision: 82cb521d636b282340378d80a6307a08e3d4a4c4
Apply the file using Kubectl
kubectl apply -f petclinic-image-build.yaml
This process will take around 5 -10 Minutes to finish depending on the resources Docker Desktop has. Keep watching the images CRD to see if the images is finished building.
kubectl get images.kpack.io
Once the image is build you should see the output of the Docker Hub URL where the Container image is located. The output should be similar to this. Capture the Image location from your command to list images.
[bsavla] ci-cd 🐘kubectl get images.kpack.io
NAME        LATESTIMAGE                                                                                          READY
ttv-image   index.docker.io/boskey/app@sha256:949a72120f888b2f37fdf3be0c439422ce4d2225529aa533aae6f6cb85da9424   True
[bsavla] ci-cd 🐘
7. Update Knative Service Definition
So far we have built a container image based on the sample app Petclinic, Now we will deploy the app onto Kubernetes via Knative Serving. ArgoCD will help us automate the deployment. We now need to define a knative-serving spec for our app. The Git repository you forked already has the below spec in a file called knative-service.yaml under the knative folder. This spec file tells Knative where to fetch the container image for the application that needs to be deployed on Kubernetes. Edit the file knative-service.yaml in the Git repository you forked in step 1. Change the image property to the image URL you got from kpack (step 6). The file should be under the folder knative.
apiVersion: serving.knative.dev/v1 # Current version of Knative
kind: Service
metadata:
  name: petclinic-knative # The name of the app
  namespace: default # The namespace the app will use
spec:
  template:
    spec:
      containers:
       - image: index.docker.io/boskey/app@sha256:9595c435357a6105bbd26405d6eaa15bd6a7d4ae4b2e5f42946b169ef9257f76  # generated by kpack
8. Use ArgoCD to deploy application.
Let’s create an application using ArgoCD, Replace the --repo URL with the Github repo you forked in Step 1
argocd app create petclinic --repo https://github.com/Boskey/spring-petclinic.git --path knative --dest-server https://kubernetes.default.svc --dest-namespace default
This tells ArgoCD to create an application called petclinic on the local cluster and the --path variable tells ArgoCD how to deploy. In our case the --path variable points to the knative-serving specification. So ArgoCD will pass the knative-serving specification to the local Kubernetes cluster, where the CRD for Knative will understand how to deploy the application and will automatically create Deployments, resource pools, Services etc.
Let’s Sync the app in ArgoCD
argocd app sync petclinic
This will deploy PetClinic on the Kubernetes Cluster along with a URL petclinic-knative.default.example.com. You can look at all the resource that were created
kubectl get all
You can look at the application deployed.
kubectl -n contour-external port-forward svc/envoy 8080:80
curl -H "Host: petclinic-knative.default.example.com" localhost:8080
If you want to look at the application on your browser, create a DNS entry in your /etc/hosts file as below
127.0.0.1 petclinic-knative.default.example.com
And browse to http://localhost:8080
You should see the Petclinic Application deployed there.
Let’s say you have an update to the PetClinic application, you apply your changes and push them to the repo on Github. To deploy the newer version, all you have to do is create a new container image using kpack and update the knative-serving specification file with the new image location at knative-service.yaml. When synced, ArgoCD will detect the change in the file, and re-deploy the application with the newer container image using knative-serving. Knative will detect that this is an updated version of the same application and will deploy the new version with an updated revision.
You can also create a new deployment for different pipelines like staging by creating a new application in ArgoCD and pointing them to the same knative-service.yaml file.