Design Studio
Understand the problem from different team perspectives and generate many solution sketches using scenario as a guide
Phases
Suggested Time
60-90 min
Participants
Core team, subject matter experts (SMEs)
Why do it?
By encouraging cross-disciplinary roles to think deeply about a problem simultaneously, we discover many more unknowns than if a designer sketched alone. Additionally, when developers are in the process they understand where the product and/or service are going and are able to make better decisions. It can save them time later as they’re developing the product we create as a team.
When to do it?
Design studios can help with generating areas to explore and prioritize a range of different problem areas early in the Discovery process. They can also be used to generate a great number of ideas to address more granular user needs later on.
What supplies are needed?
- Whiteboard or digital version like Miro
- User journey(s)
- Persona(s)
- Scenario (if already available)
- Painter’s tape
- Sharpies / fine-tipped markers
- Red pens
- Paper
- Small sticky dots
How to Use this Method
Remote Tip: For distributed teams, use Miro or a similar “digital whiteboard” and adapt the in-person aspects to the digital world, such as drawing and using sticky notes.
Sample Agenda & Prompts
-
Leveraging any user journeys, personas, or scenarios your team has made, define what problem you are trying to solve and for whom.
What are the biggest pain points?
-
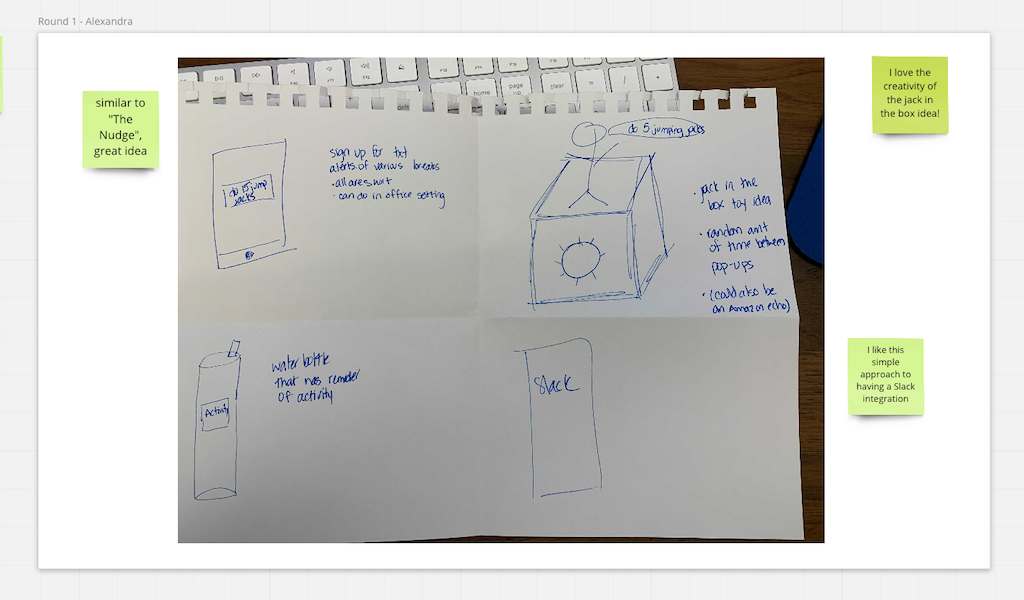
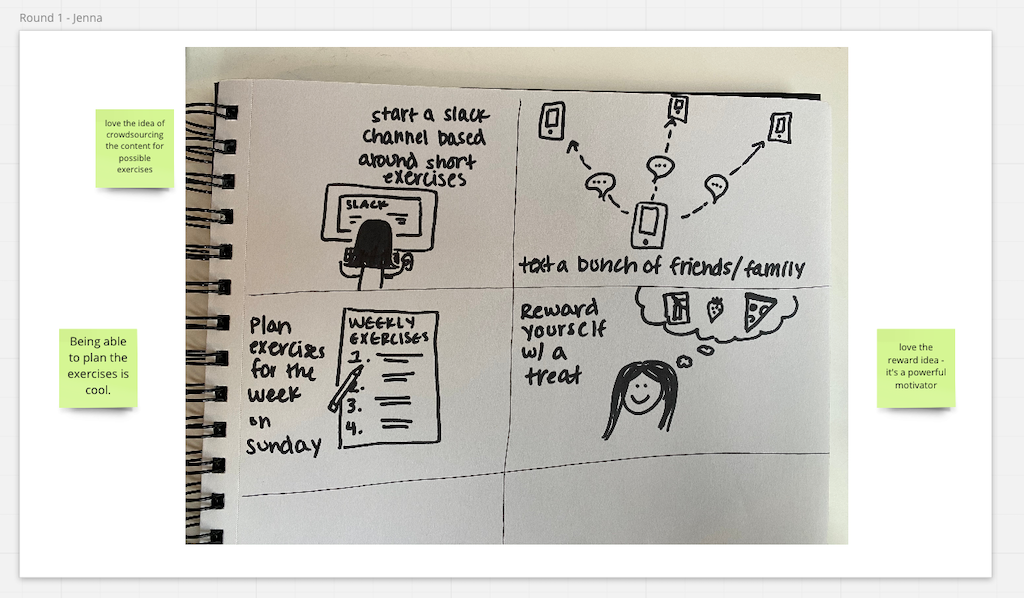
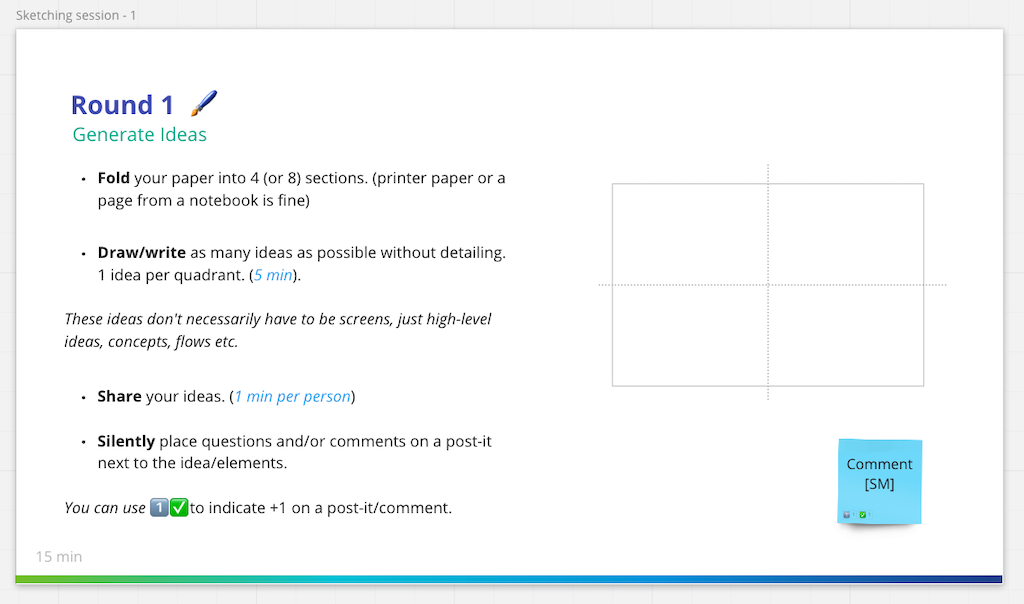
Instruct everyone to fold sheets of paper into 4, 6, or 8 sections, or make similar sections on your digital collaboration tool. The goal is to create lots of small ideas instead of detailed solutions.
Tip: If participants are uncomfortable with sketching, take 10 minutes to do drawing warm up exercises (basic shapes, expressions, stick figures, simple wire frame notations for pictures, text, and boxes).
-
Next, set a timer for 5-10 minutes and have each person generate as many ideas as possible using the following prompt:
“How might we design an experience that addresses [the problem]? Use the sheets of paper to come up with as many ideas as possible and don’t over think how you draw it out.”
Tip: It’s important not to not think of the paper as a computer or mobile screen, and to not get too caught up in details. We are looking for lots of ideas of high-level concepts.
-
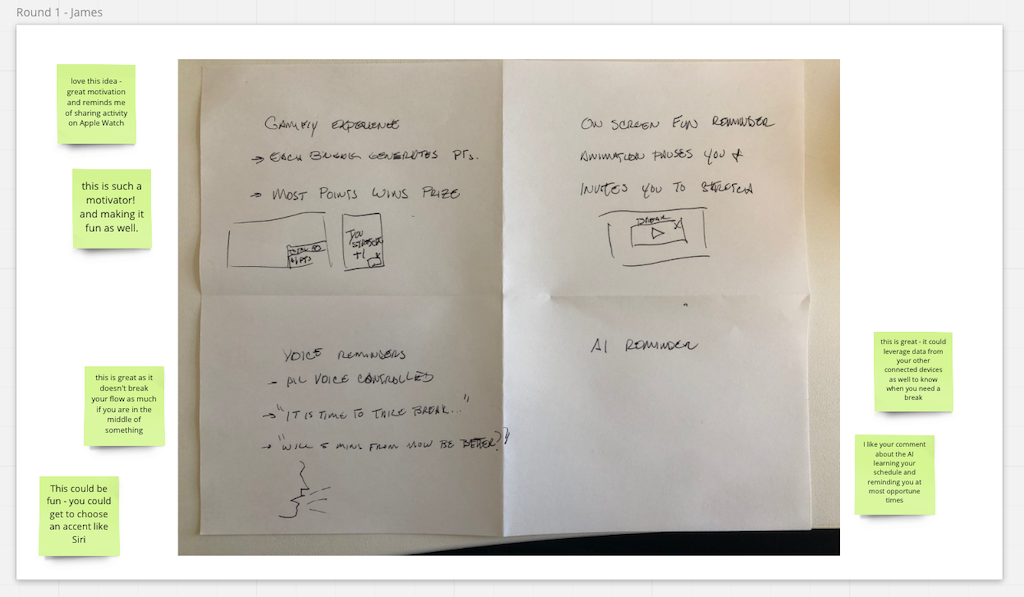
After time is up, ask each person to share their explorations (1-2 minutes per person). Encourage the team to write down questions or feedback on sticky notes and attach them to the sheet. Make sure everyone gets a turn to share.
-
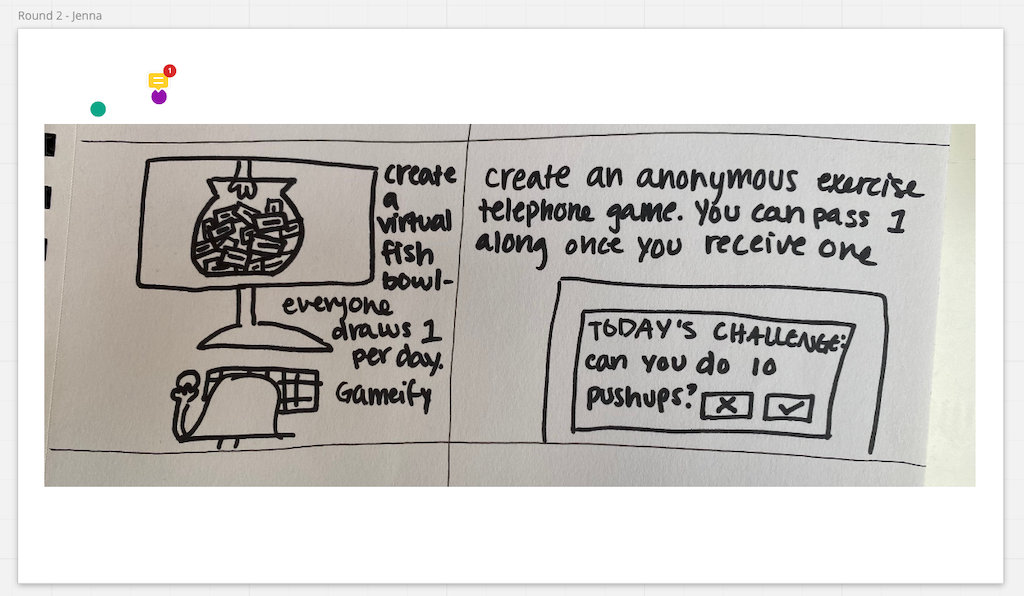
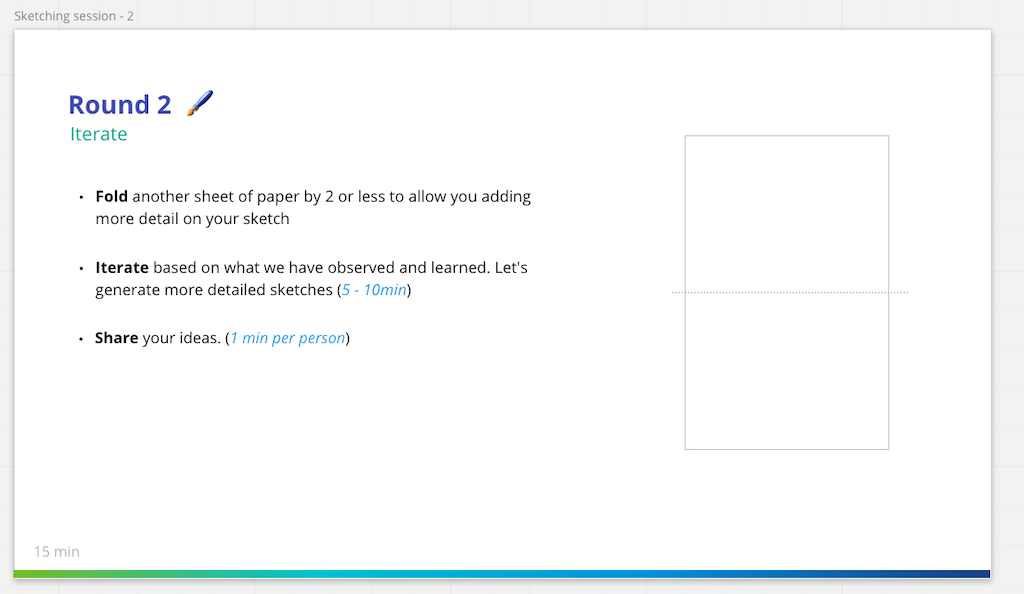
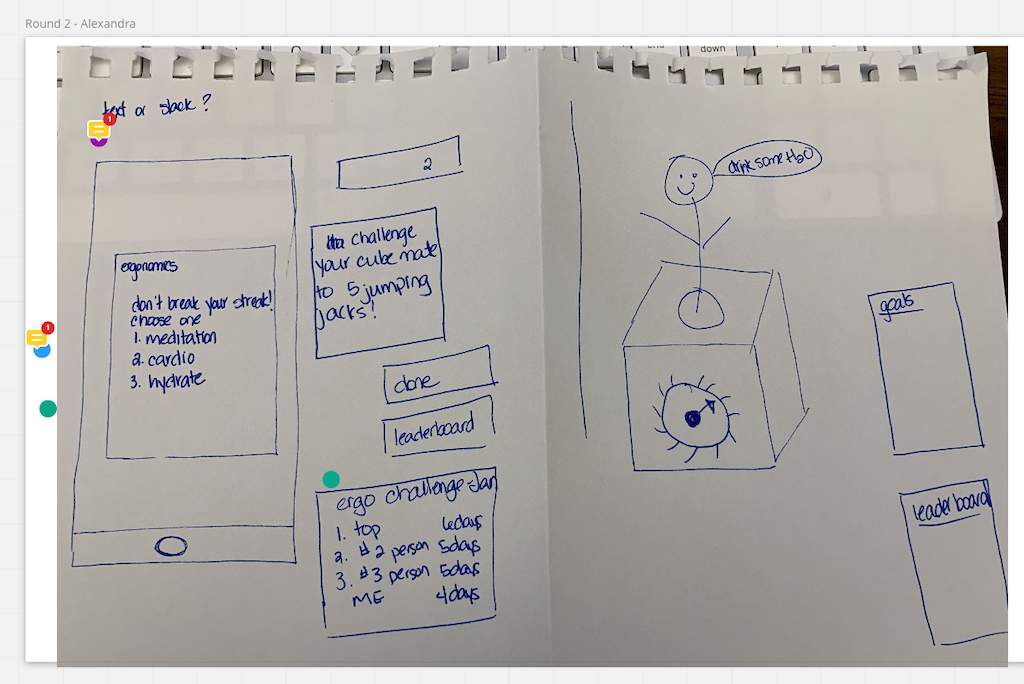
After the share out, do a second round of idea generation. This time, instead of starting from scratch, build on the ideas you discussed and push the ideas further.
-
Have each person share out again (1-2 minutes per person).
-
Tape or add all designs to the whiteboard, spaced adequately to allow for silent review.
-
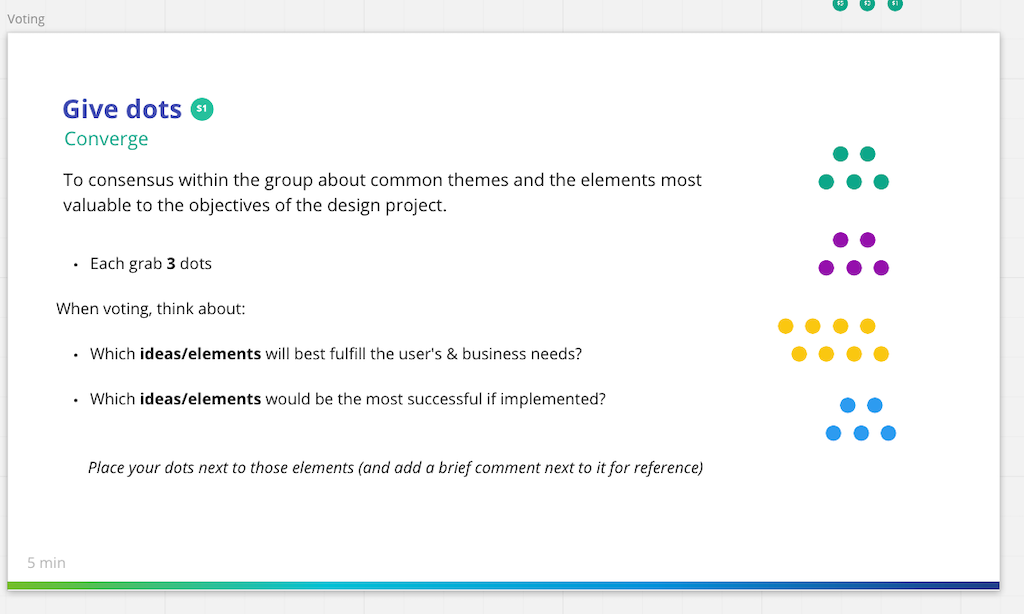
Give each participant an appropriate number of dots (e.g. if there are 8 participants, give 5 dots; fewer/more if there are fewer/more participants; the goal is to make people think critically about their votes), set the timer for 5-7 minutes, and ask them to dot the sketch elements (i.e. not the entire sketch) that they think could be the most successful if implemented.
-
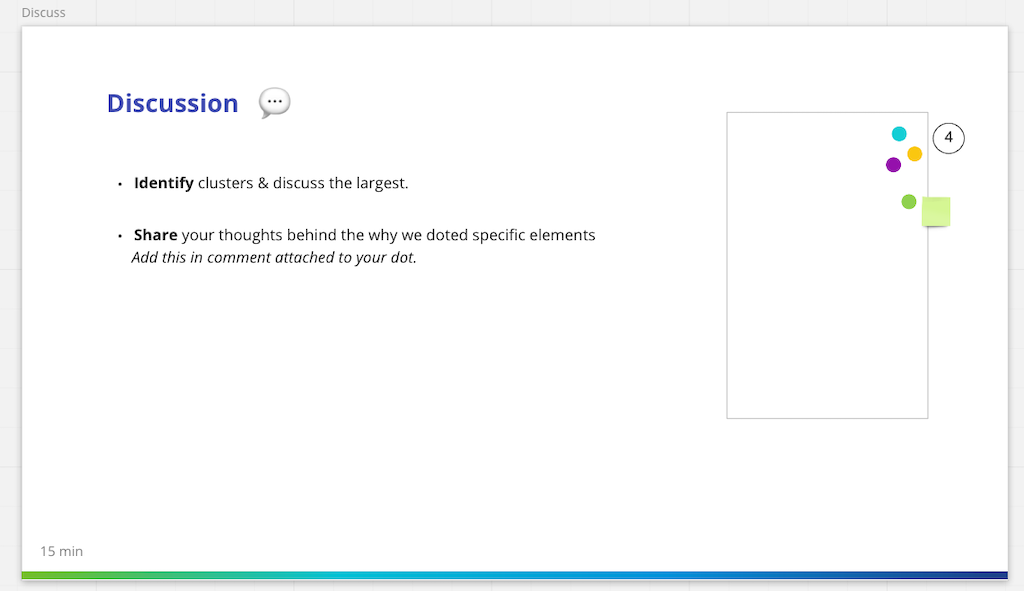
Once complete, look for clusters of dots and discuss the largest. Ask the group to elaborate on why they dotted what they did and catalog the rationale behind each on the whiteboard, piece of paper, or in the digital workspace.
Success/Expected Outcomes
Success is when you have a clear understanding of the ideas each participant has about how best to solve a particular problem. You’ve put those ideas “onto paper”, discussed them as a group, voted on the ones the team feels most likely to create user value, and captured the rationale.
It’s very likely that the actual solution will look different than these sketches, so understanding why the team felt how they did about certain elements will help the design team make good choices as they iterate.
The top ideas that came out of the design studio will be carried forward and synthesized further by the designer(s).
Facilitator Notes & Tips
- Use black colored sharpies or fine tipped pens to sketch, colored pens (ideally red) for comments
- Encourage people to title each idea to make it easier to reference
- Encourage people that drawing skills are not necessary to visualize ideas
- Be positive, but you can always give constructive comments about trade offs
- Be sure to focus on the user journeys
- You can use any variety of paper sizes and squares; it’s about generating quantity, not detail
Related Practices
Variations
For Remote Teams
You can still facilitate this workshop even if the team is remote.
While many on-line collaboration solutions have drawing features, we suggest keeping thing low-tech: use paper and cameras.
-
Have people fold and draw upon actual paper as described above.
-
Next, have them take a photo on their phone and upload the photo to the collaboration space.
Alternatively, send the photos to the facilitators via chat app, email, or even text message. People can even hold up their drawings to their webcam – the facilitator can take a screenshot, then add the image to the collaboration space.
-
For all other steps, such as dot-voting, use the digital whiteboard with the drawing photos.
Preceding
Real World Examples