Getting Started with Kubeapps
Tiffany Jernigan
This guide will walk you through the process of deploying Kubeapps for your cluster and installing an example application.
This getting started guide is a copy of Get Started with Kubeapps in the kubeapps/kubeapps repository inclusive of commit 1e49264 on April 20, 2020.
This guide is also available in video form:
Prerequisites
Kubeapps assumes a working Kubernetes cluster (v1.8+),
Helm (2.14.0+) installed in your cluster and
kubectl installed
and configured to talk to your Kubernetes cluster. Kubeapps has been tested with
Azure Kubernetes Service (AKS), Google Kubernetes Engine (GKE), minikube and
Docker for Desktop Kubernetes. Kubeapps works on RBAC-enabled clusters and this
configuration is encouraged for a more secure install.
On GKE, you must either be an “Owner” or have the “Container Engine Admin” role in order to install Kubeapps.
Step 1: Install Kubeapps
Use the Helm chart to install the latest version of Kubeapps:
For Helm 2:
helm repo add bitnami https://charts.bitnami.com/bitnami
helm install --name kubeapps --namespace kubeapps bitnami/kubeapps
If you are using Helm 3, you need to set an extra flag to enable it:
helm repo add bitnami https://charts.bitnami.com/bitnami
kubectl create namespace kubeapps
helm install kubeapps --namespace kubeapps bitnami/kubeapps --set useHelm3=true
For detailed information on installing, configuring and upgrading Kubeapps, checkout the chart README.
The above commands will deploy Kubeapps into the kubeapps namespace in your
cluster. It may take a few minutes to execute. Once it has been deployed and the
Kubeapps pods are running, continue to step 2.
Step 2: Create a Kubernetes API token
Access to the Dashboard requires a Kubernetes API token to authenticate with the Kubernetes API server.
kubectl create serviceaccount kubeapps-operator
kubectl create clusterrolebinding kubeapps-operator --clusterrole=cluster-admin --serviceaccount=default:kubeapps-operator
Note: It’s not recommended to create cluster-admin users for Kubeapps
production usage. Please refer to the
Access Control
documentation to configure fine-grained access control for users.
To retrieve the token,
On Linux/macOS:
kubectl get secret $(kubectl get serviceaccount kubeapps-operator -o jsonpath='{range .secrets[*]}{.name}{"\n"}{end}' | grep kubeapps-operator-token) -o jsonpath='{.data.token}' -o go-template='{{.data.token | base64decode}}' && echo
On Windows:
Create a file called GetDashToken.cmd with the following lines in it:
@ECHO OFF
REM Get the Service Account
kubectl get serviceaccount kubeapps-operator -o jsonpath={.secrets[].name} > s.txt
SET /p ks=<s.txt
DEL s.txt

REM Get the Base64 encoded token
kubectl get secret %ks% -o jsonpath={.data.token} > b64.txt

REM Decode The Token
DEL token.txt
certutil -decode b64.txt token.txt
Open a command prompt and run the GetDashToken.cmd Your token can be found in
the token.txt file.
Step 3: Start the Kubeapps Dashboard
Once Kubeapps is installed, securely access the Kubeapps Dashboard from your system by running:
kubectl port-forward -n kubeapps svc/kubeapps 8080:80
This will start an HTTP proxy for secure access to the Kubeapps Dashboard. Visit http://127.0.0.1:8080/ in your preferred web browser to open the Dashboard. Here’s what you should see:
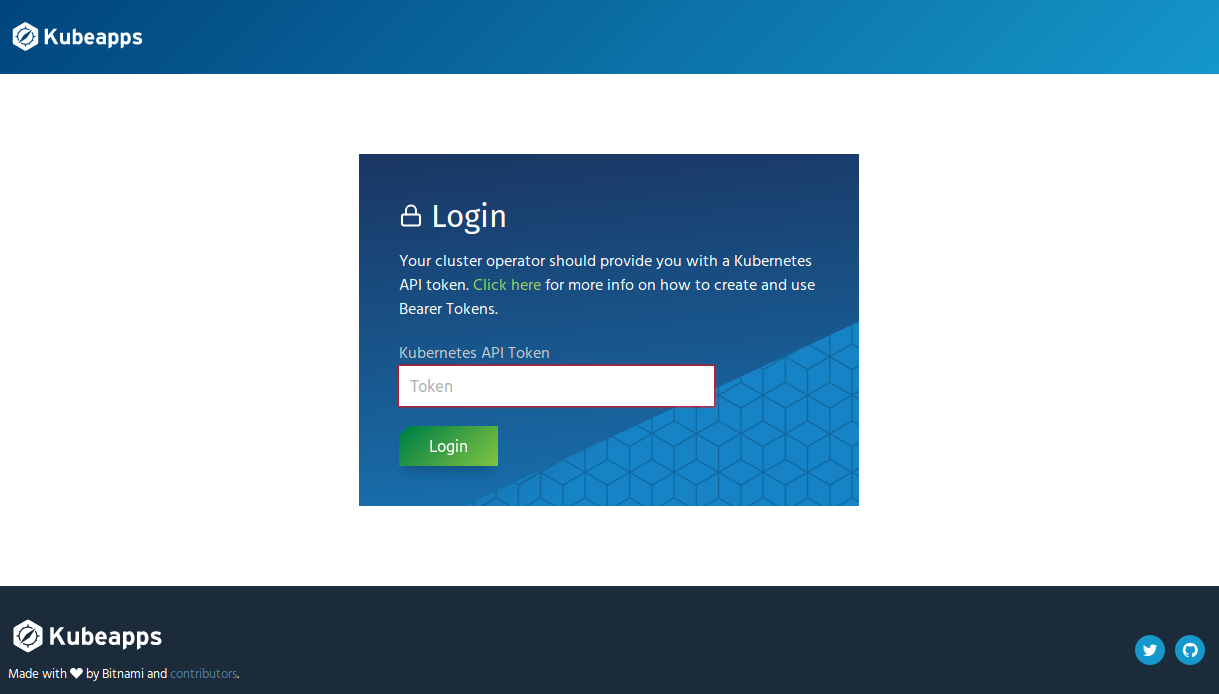
Paste the token generated in the previous step to authenticate and access the Kubeapps dashboard for Kubernetes.
Note: If you are setting up Kubeapps for other people to access, you will
want to use a different service type or setup Ingress rather than using the
above kubectl port-forward. For detailed information on installing,
configuring and upgrading Kubeapps, checkout the
chart README.
Step 4: Deploy WordPress
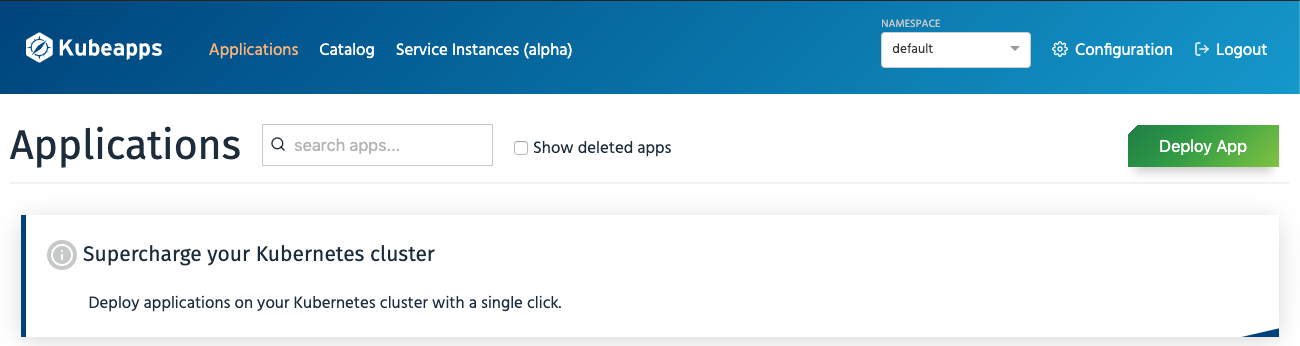
Once you have the Kubeapps Dashboard up and running, you can start deploying applications into your cluster.
-
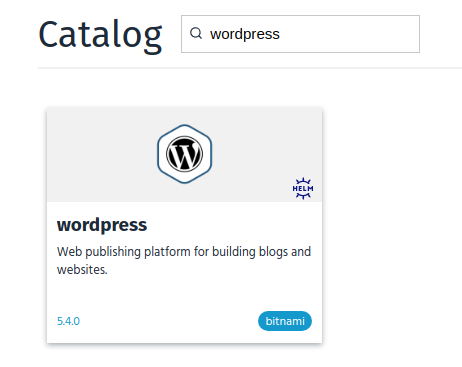
Use the “Deploy App” or click on the “Catalog” page in the Dashboard to select an application from the list of charts in any of the configured Helm chart repositories. This example assumes you want to deploy WordPress.
-
Click the “Deploy” button.

-
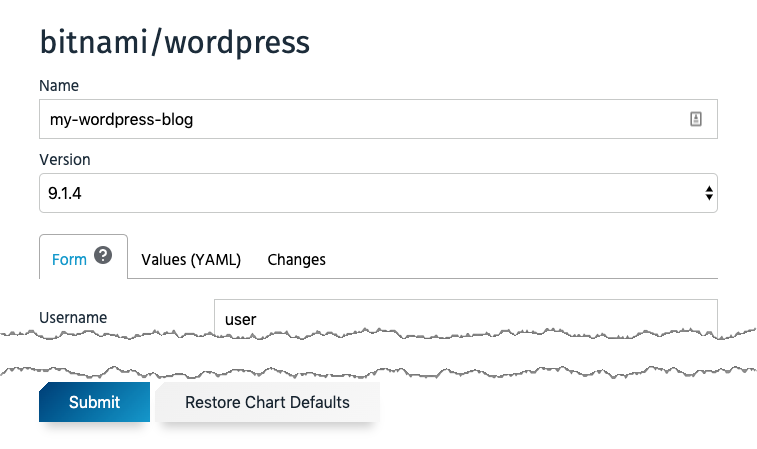
You will be prompted for the release name and values for the application. The form is populated by the values (YAML), which you can see in the adjacent tab.
-
Click the “Submit” button. The application will be deployed. You will be able to track the new Helm deployment directly from the browser. The status will be shown at the top and you can also look at the individual resources lower in the page. It will also show the number of ready pods. If you run your cursor over the status, you can see the workloads and number of ready and total pods within them.
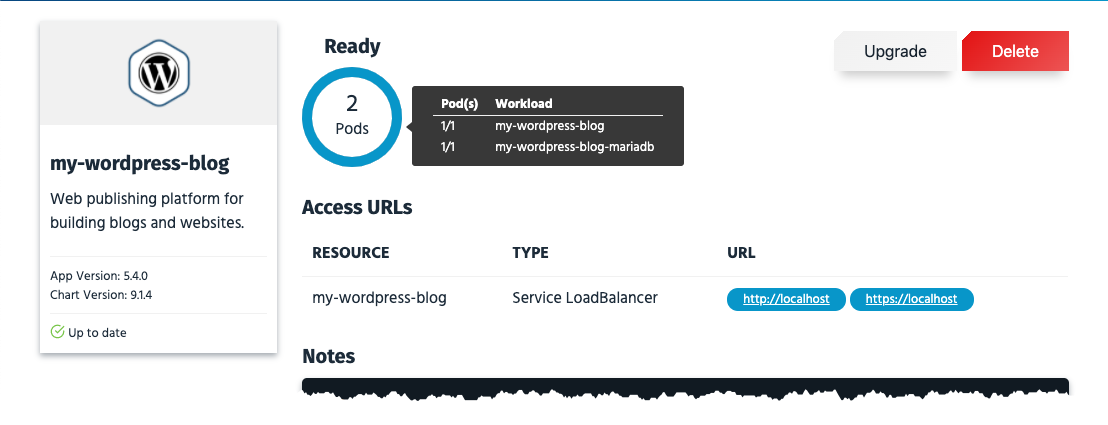
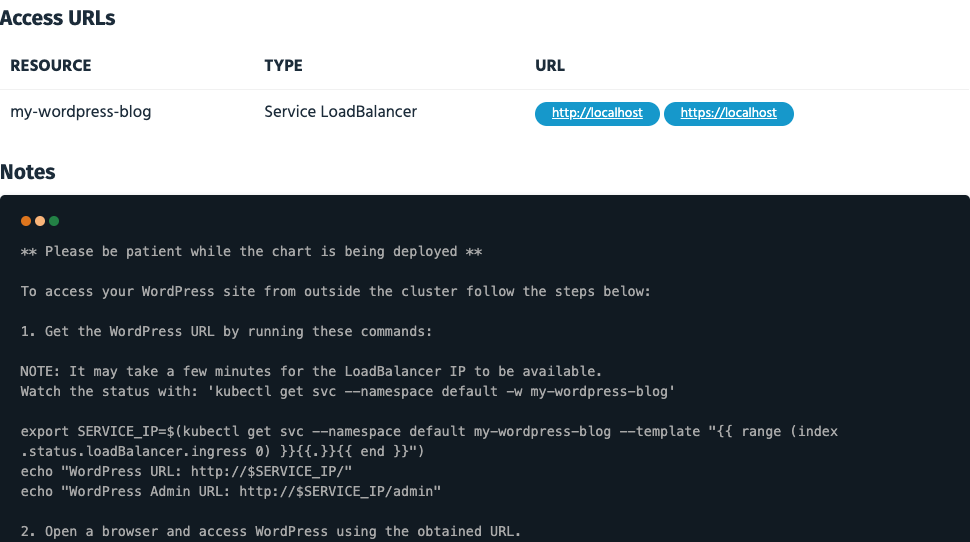
To access your new WordPress site, you can run the commands in the “Notes” section to get the URLs or simply click a URL (HTTP and HTTPS) shown.
Note: Depending on your cloud provider of choice, it may take some time
for an access URL to be available for the application and the Service will stay
in a “Pending” state until a URL is assigned. If using Minikube, you will need
to run minikube tunnel in your terminal in order for an IP address to be
assigned to your application.
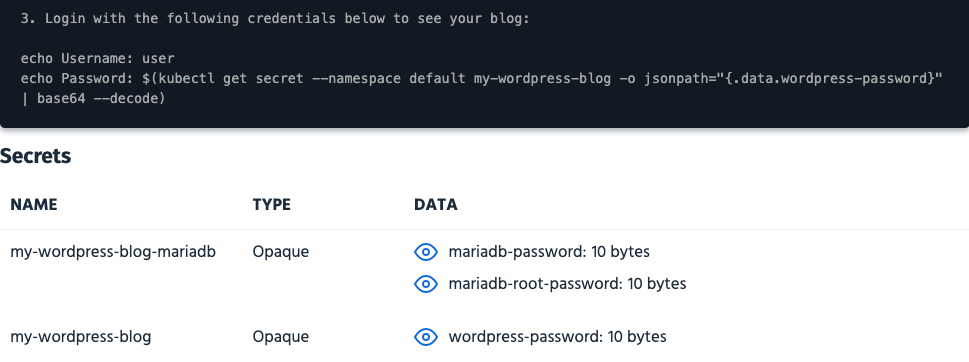
To get the credentials for logging into your WordPress account, refer to the
“Notes” section. You can also get the WordPress password by scrolling down to
“Secrets” and clicking the eye next to wordpress-password.
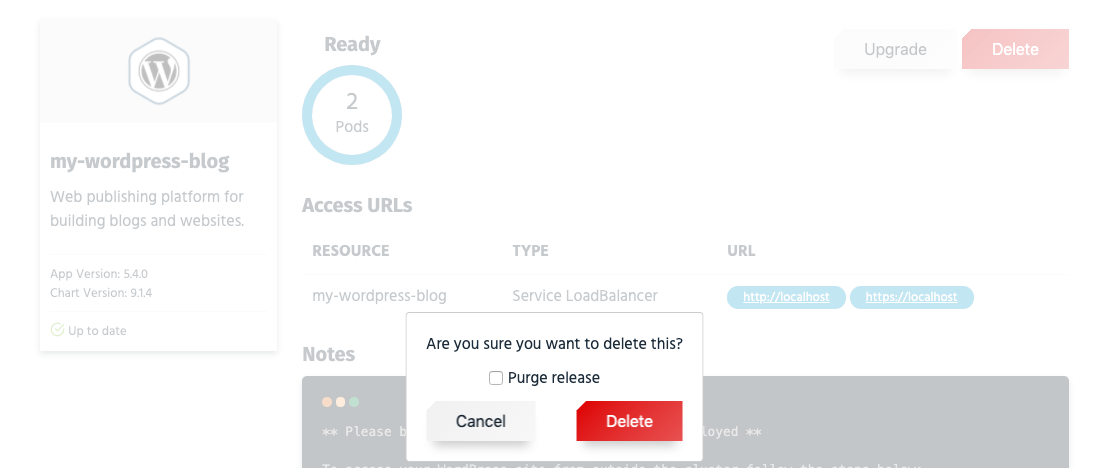
[Optional] Step 5: Uninstall/Delete WordPress
If you want to uninstall/delete your WordPress application, you can do so by clicking the “Delete” button. You can choose to click the checkbox for “Purge Release” (default action with the Helm 3 CLI). If you do not click it, the Helm chart history will remain (default action with Helm 2). This is fine, so long as you don’t attempt to install another chart with the same name in the same namespace.
Next Steps
Learn more about Kubeapps with the links below:
- Detailed installation instructions
- Deploying Operators
- Kubeapps Dashboard documentation
- Kubeapps components
- Roadmap