Probing Application State
John Harris
Adding probes to your application provides two critical pieces of information to the system running it.
- Is the application ready to receive traffic?
- Is the application healthy?
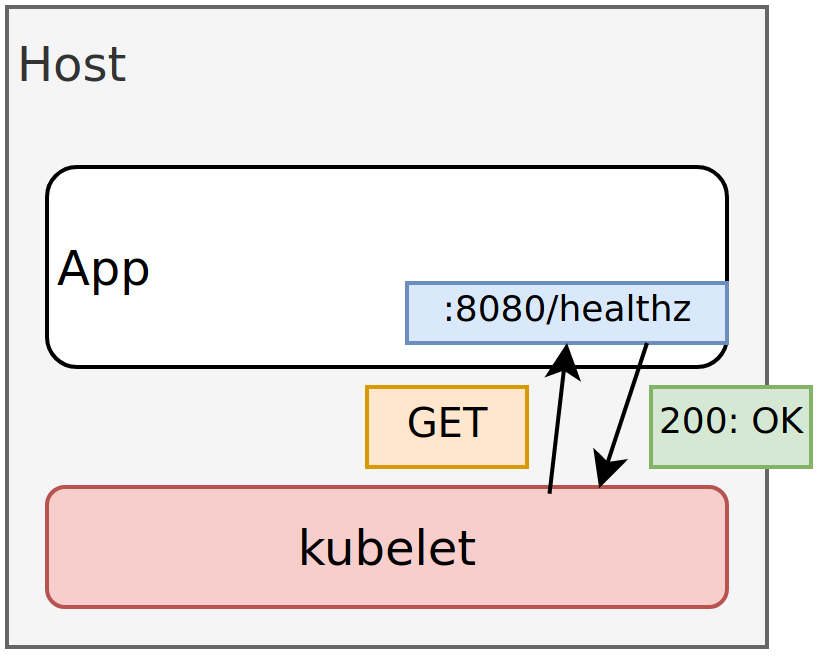
Cloud Native platforms have methods to probe the application and answer the above questions. In the case of Kubernetes, the kubelet (Kubernetes agent that runs on every host) can execute a command inside the container, make an HTTP request, or make a TCP request.

Adding Probes to your Applications
Two approaches for adding probes to your applications are:
- Add an endpoint that responds based on the state of the application.
- Run a command (process) in the container and validate condition or output.
Option 1 is preferred. Since the endpoint is implemented in the application, it can perform an in-depth check before responding to the requester. However, this option does require code modification.
Option 2 requires no application modification. It is ideal for legacy applications where adding an endpoint is non-trivial. It does assume there is a command that can be run to validate something about your application. For example, a configuration file that is only created once the application is up and running. An example command that could validate this is as follows.
cat /etc/alive.conf
When the file /etc/alive.conf does not exist, cat will return an error code. This indicates
the application is not ready.
Choosing Probes
Kubernetes provides three different types of probes to test whether applications are up and running and ready to receive traffic:
- Readiness - The
Podis ready (if not true, don’t send traffic to it) - Liveness - The
Podis alive (if not true, restart it) - Startup - The
Podhas finished initialization (proceed with Liveness and Readiness probes)
We highly recommend applications always have Readiness probes. Liveness probes are recommended, but it’s important that their check does not rely on external dependencies. Meaning you need to be mindful that your application doesn’t get restarted due to external services or dependencies being unavailable.
Startup probes are generally not recommended as you can almost
always achieve the same results with liveness/readiness.
At the time of writing, startupProbe’s are expected to be
promoted to Beta in Kubernetes 1.18.
Determining Application Readiness
Readiness represents whether the application is ready to receive traffic. This is helpful when your application process(s) start but require some amount of initialization before being active. It is best practice to define a readiness check in your application.
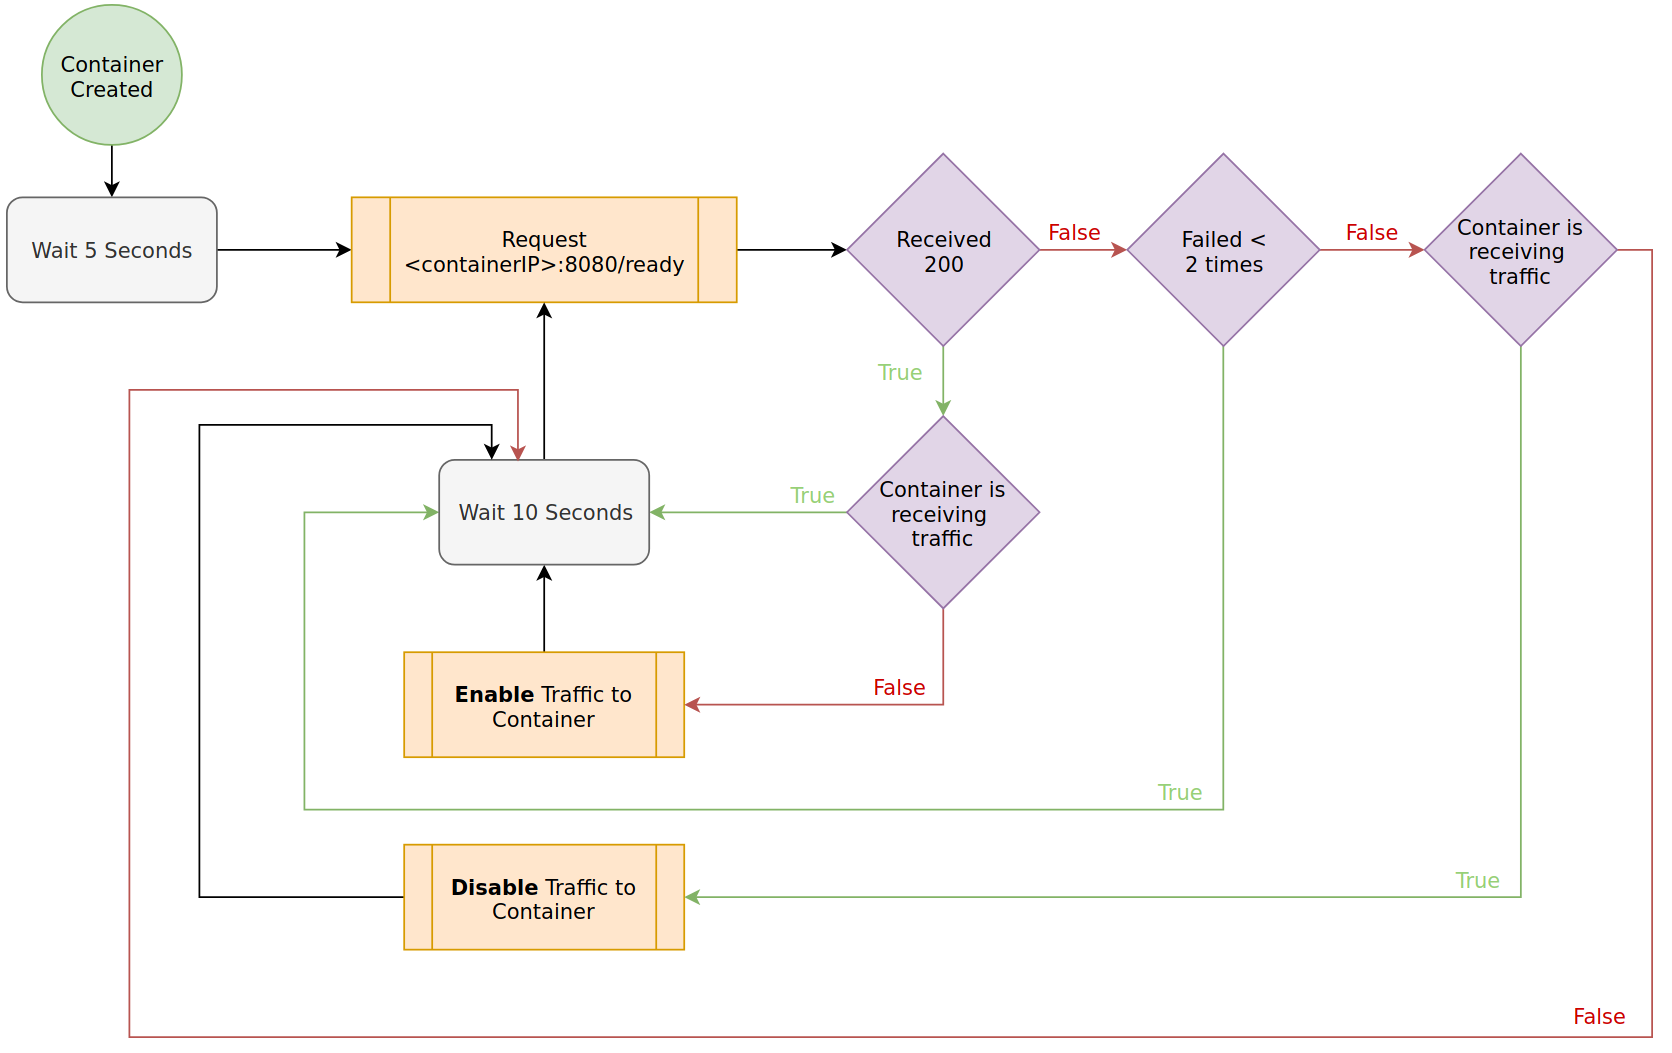
In Kubernetes, readiness probes are configured in spec.containers[i].readinessProbe. An example
configuration is as follows.
readinessProbe:
  httpGet:
    path: /ready
    port: 8080
  initialDelaySeconds: 5
  periodSeconds: 10
  failureThreshold: 2
The following diagram demonstrates the impact of this readinessProbe.

Determining Application Liveness
Liveness represents whether the application is healthy. If it is determined unhealthy, the container failing the check is restarted. As applications run for a long duration, it is essential these checks are in place.
In Kubernetes, readiness probes are configured in spec.containers[i].livenessProbe. They are
nearly identical to readinessProbes, but upon failure restart the container rather than just
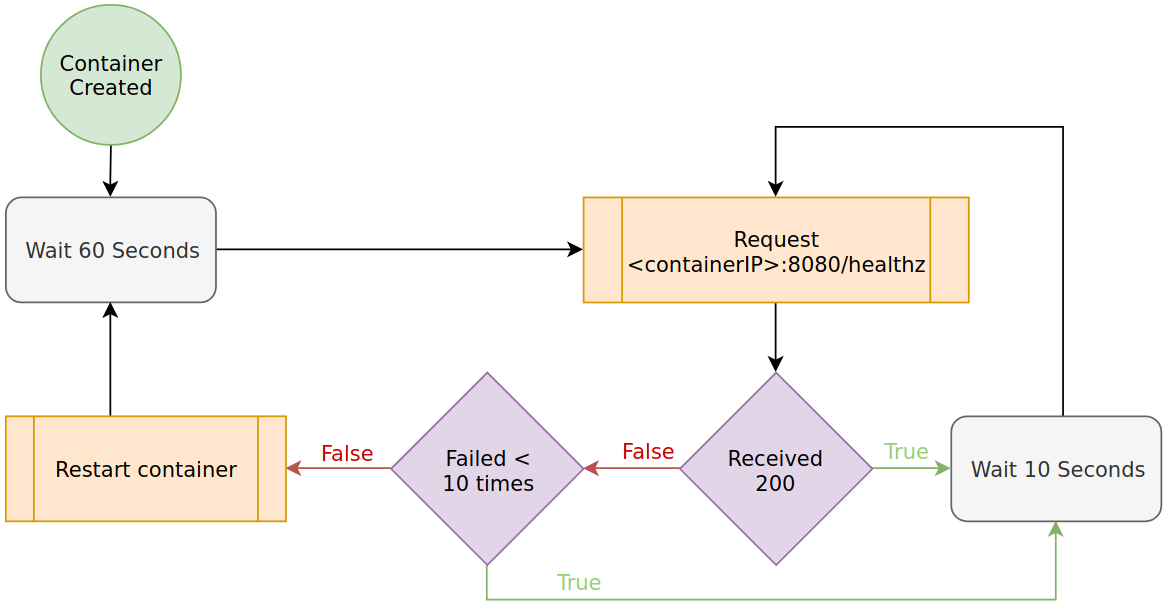
halting traffic. An example configuration is as follows.
livenessProbe:
  httpGet:
    path: /healthz
    port: 8080
  initialDelaySeconds: 60
  periodSeconds: 10
  failureThreshold: 10
The following diagram demonstrates the impact of this livenessProbe.

Startup Probes - Protecting Slow Container Initialization
Note: Startup Probes are not enabled by default until Kubernetes 1.18. Until then, they need to be enabled via --feature-gates on the kube-apiserver and the kubelet in each node.
Sometimes a livenessProbe might be ideal as an ongoing check,
but not necessarily for initialization time.
Some applications might require additional time during startup,
for example when warming up a cache or preparing their
data store for the first time. In these cases, the
livenessProbe’s failureThreshold and periodSeconds settings
might turn out to be too short, and increasing them could
diminish the value of the checks through the container’s lifetime.
The need for an initialization-only check is covered with
a startupProbe. It can be configured with the same or a different
command, TCP, or HTTP check as your livenessProbe and with longer
thresholds, long enough to cover the worst-case
scenario startup time.
Our previous example could be modified to look as follows.
livenessProbe:
  httpGet:
    path: /healthz
    port: 8080
  periodSeconds: 10
  failureThreshold: 10

startupProbe:
  httpGet:
    path: /cache/healthz
    port: 8080
  periodSeconds: 10
  failureThreshold: 30
Note that initialDelaySeconds can be removed from the
livenessProbe as we’re using startupProbe to cover our
Pod initialization checks. In the example above, the startupProbe
is allowing the container 300 seconds (periodSeconds * failureThreshold)
to finish its startup. It is also validating against a different
endpoint than the livenessProbe.

When a startupProbe is defined, all other checks are disabled until it succeeds.