Octant is a tool designed to enable developers without a deep knowledge of Kubernetes to become productive as quickly as possible. This post will walk through an NGINX deployment with a faulty NGINX configuration to demonstrate how common pitfalls can be identified using Octant.
Before You Begin
Before you get started, here are the tools you’ll need:
- An existing cluster through KinD, Minikube, or a cloud provider
- An installation of Octant 0.16.1 or above
- Some knowledge of NGINX (helpful but not required)
Create an NGINX Deployment
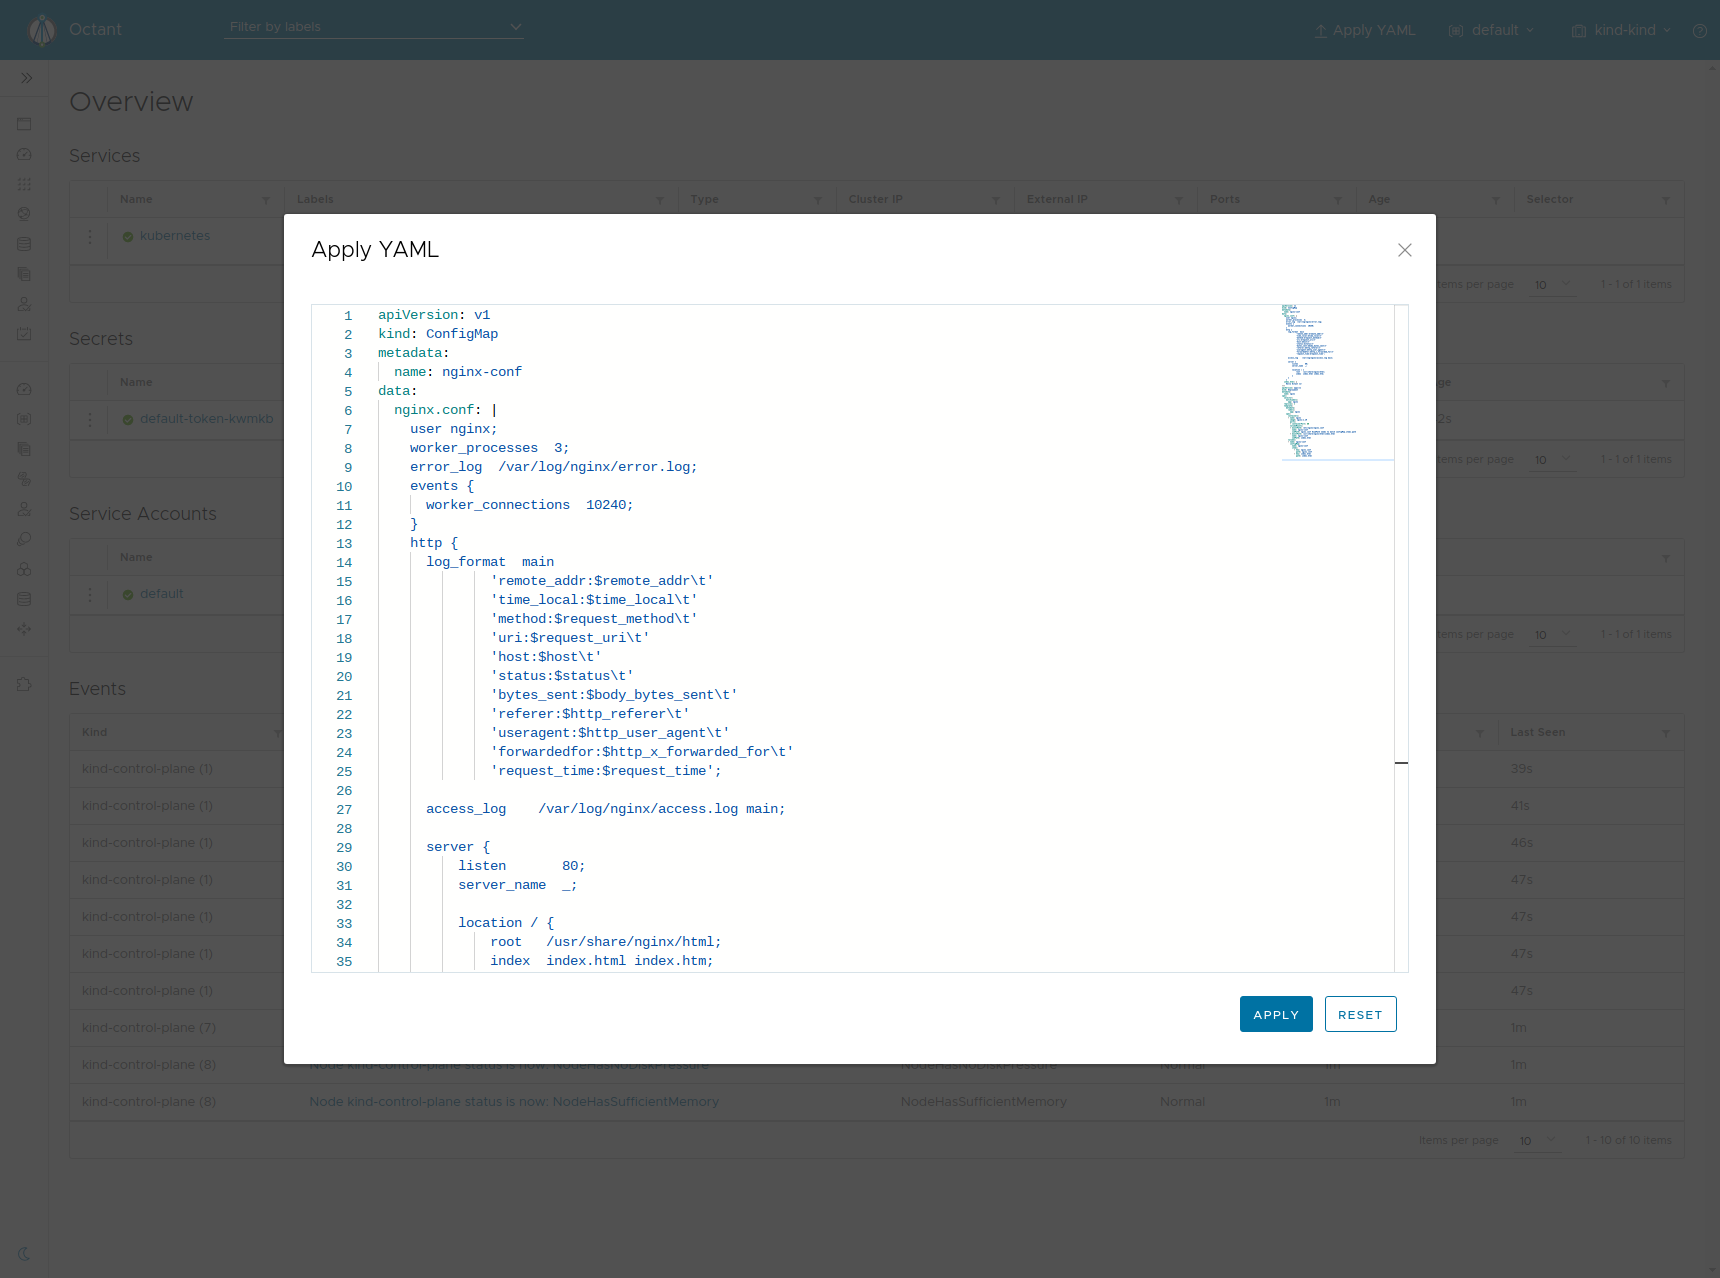
Let’s start with a ConfigMap containing a basic NGINX configuration and set the mount path to /etc/nginx. A deployment will mount the volume containing the NGINX configuration for the container. Copy the YAML below.
apiVersion: v1
kind: ConfigMap
metadata:
  name: nginx-conf
data:
  nginx.conf: |
    user nginx;
    worker_processes  3;
    error_log  /var/log/nginx/error.log;
    events {
      worker_connections  10240;
    }
    http {
      log_format  main
          'remote_addr:$remote_addr\t'
          'time_local:$time_local\t'
          'method:$request_method\t'
          'uri:$request_uri\t'
          'host:$host\t'
          'status:$status\t'
          'bytes_sent:$body_bytes_sent\t'
          'referer:$http_referer\t'
          'useragent:$http_user_agent\t'
          'forwardedfor:$http_x_forwarded_for\t'
          'request_time:$request_time';
      access_log	/var/log/nginx/access.log main;

      server {
          listen       80;
          server_name  _;

          location / {
              root   html;
              index  index.html index.htm;
          }
      }
    }
  index.html: |
        Hello Octant!
---
apiVersion: apps/v1
kind: Deployment
metadata:
  name: nginx
spec:
  selector:
    matchLabels:
      app: nginx
  replicas: 1
  template:
    metadata:
      labels:
        app: nginx
    spec:
      containers:
      - name: nginx
        image: nginx:1.19
        ports:
        - containerPort: 80
        volumeMounts:
        - mountPath: /etc/nginx
          name: nginx-conf
        - mountPath: /usr/share/nginx/html
          name: nginx-conf
      volumes:
      - name: nginx-conf
        configMap:
          name: nginx-conf
          items:
            - key: nginx.conf
              path: nginx.conf
            - key: index.html
              path: index.html
Open Octant and press the “Apply YAML” button on the top menu. Paste the YAML into the editor and hit “Apply”.
After the YAML is applied, press Ctrl + Enter to open the quick switcher. Type “pod,” then navigate to the list of pods by clicking the drop-down. This shortcut is also useful for navigating around various resources.

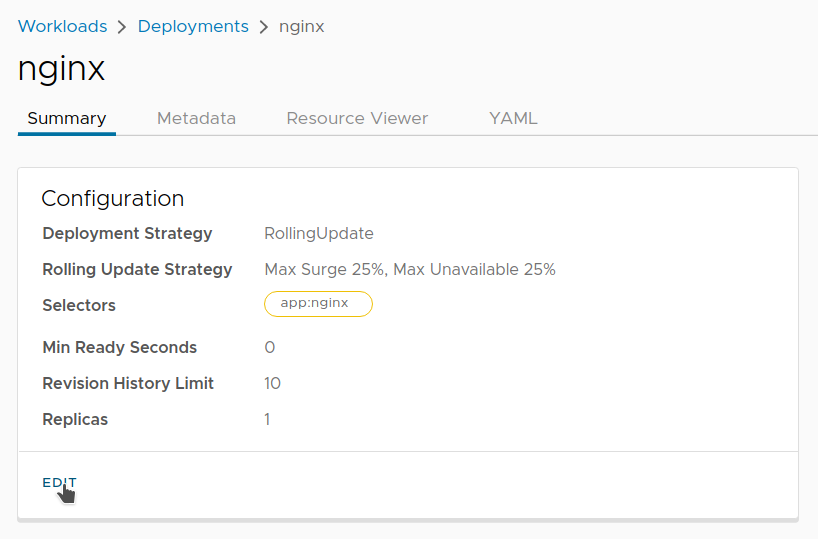
Upon initial inspection, the container is running. Click the name of the pod for more information, including the volume mounts included above.
Port Forward
The first step is to see if the NGINX landing page is visible, for which port forwarding provides a quick way to test. Click the port forward button, then click the generated link.

The port forward link leads to a 404 page. To see if the container logs provide any insight about that error, look under the “Logs” tab
Logs
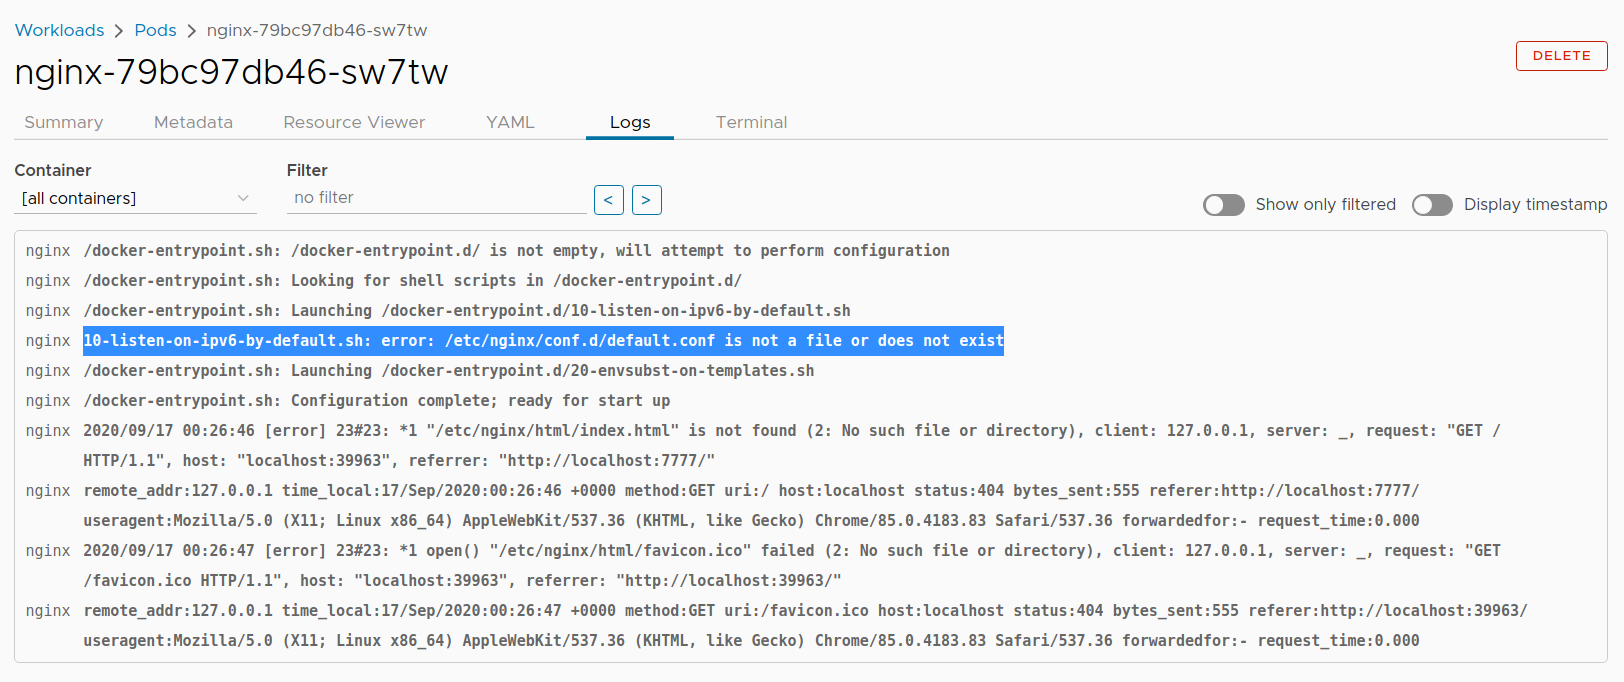
The logs show startup then the initial traffic as a result of port forwarding. And as they make clear, there are two issues with this configuration:
- There appears to be a default configuration
default.confthat does not exist. - The provided path for
index.htmlis not correct.
An NGINX container would typically have all the necessary default configuration files. As to the second issue, NGINX by default has index.html located at /usr/share/nginx/html. The terminal tab provides a way to inspect the application on a lower level so as to understand some of the logging.
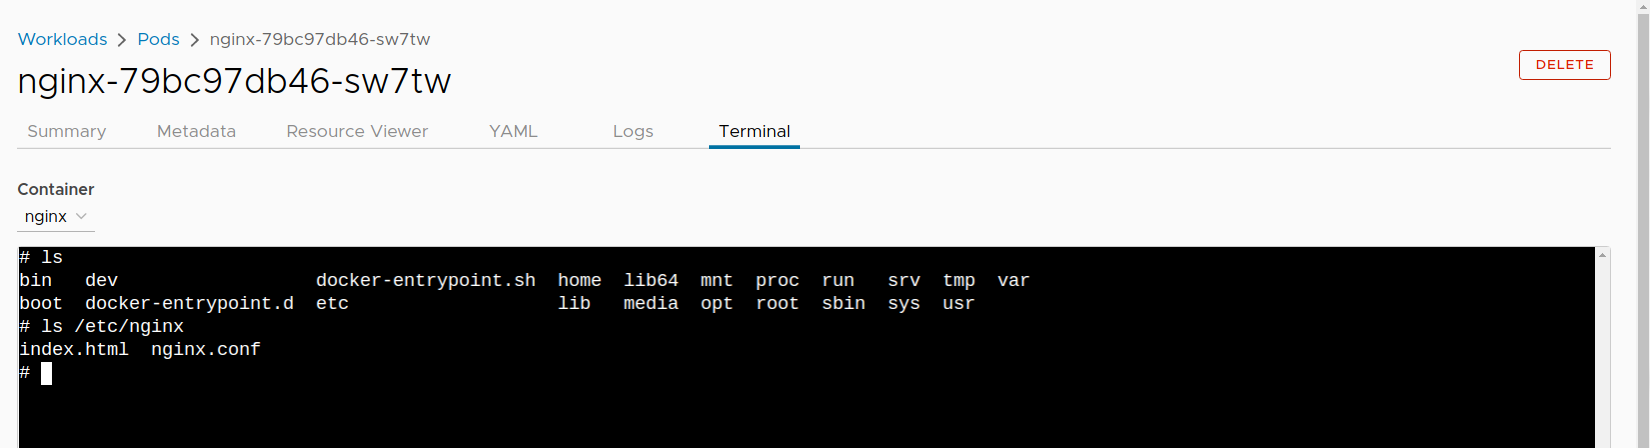
Terminal
Click the Terminal tab to start a new terminal session and list the files in /etc/nginx. As you’ll see, quite a few configuration files are missing from the expected directory structure.
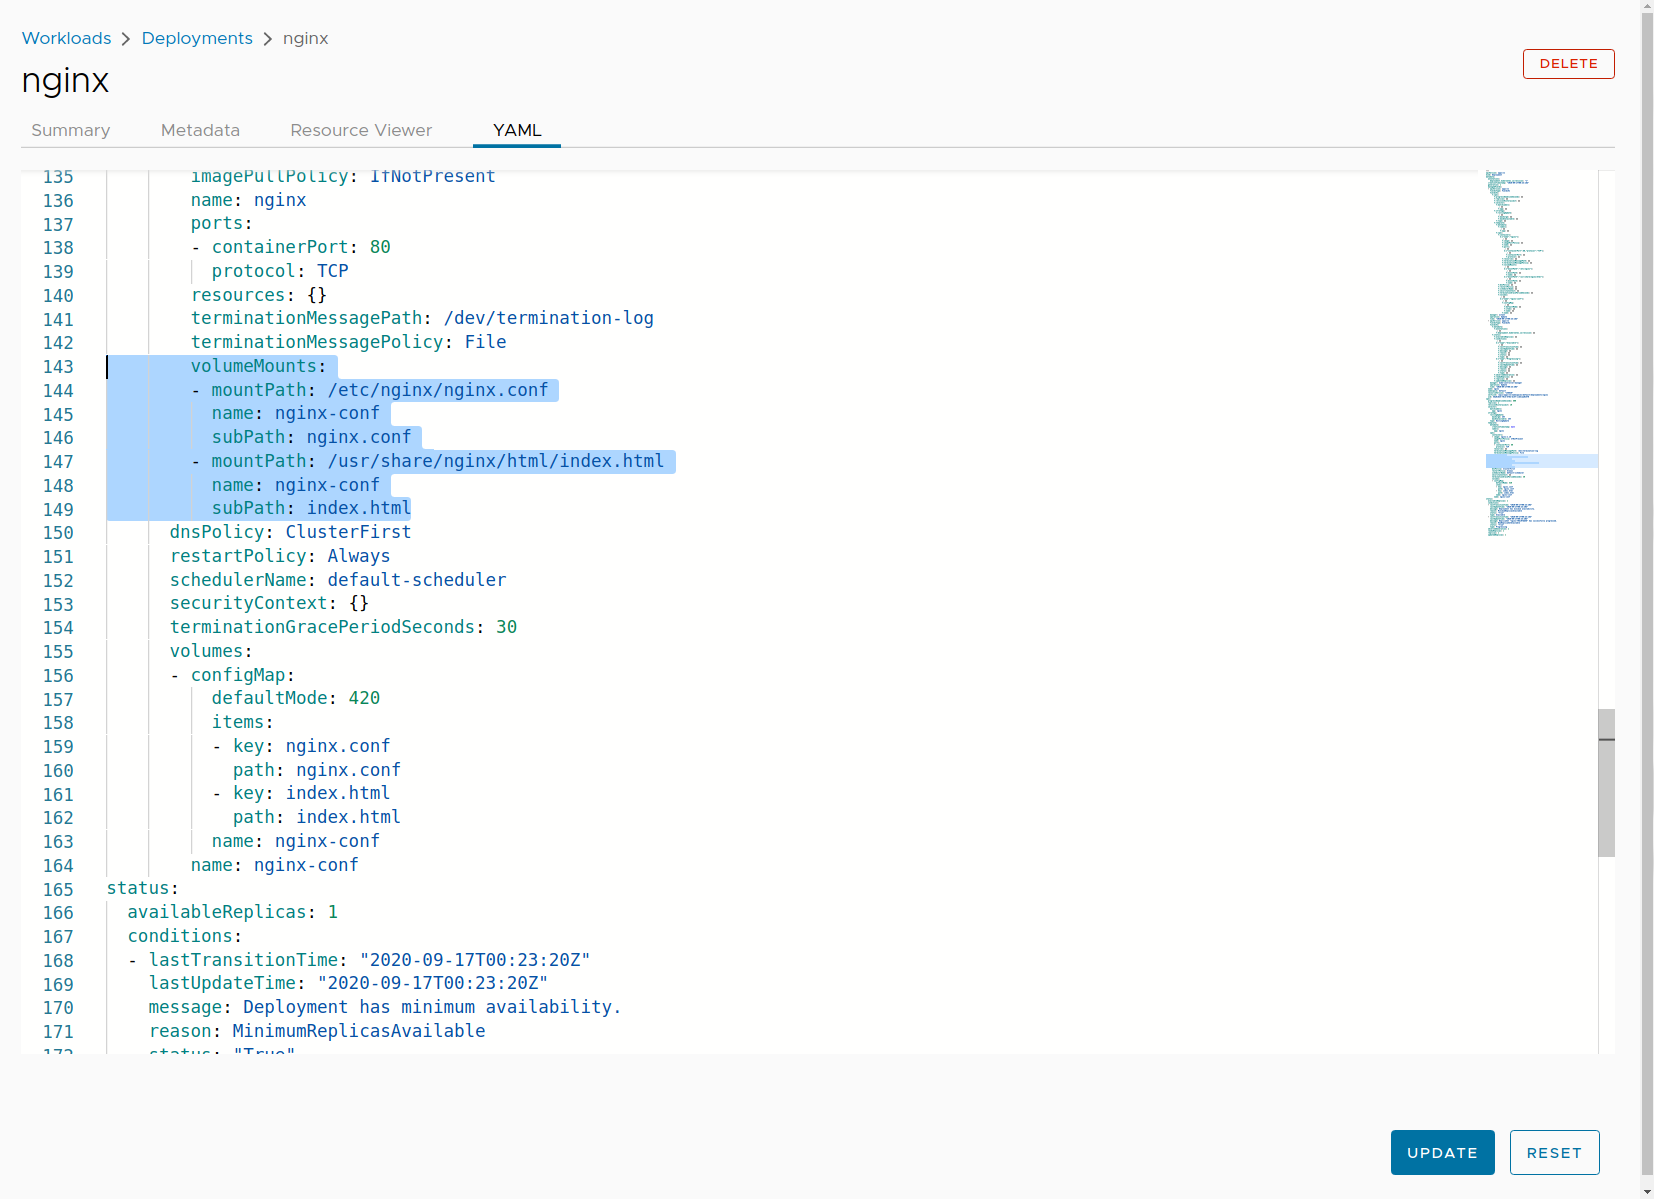
The mount path overwrites the entire directory even though only a single configuration file needs to change. The Kubernetes documentation describes this behavior. Overwrites can be avoided by specifying a subPath. This also prevents copying index.html to unnecessary places.
Navigate to the nginx-conf ConfigMap (remember the quick switcher shortcut). Then navigate to the YAML tab. Under nginx.conf, change html under “location” to /usr/share/nginx/html.

Navigate to the YAML of the nginx deployment. Edit the volume mounts to add subPath and update mountPath to the name of the configuration.
This updated deployment will automatically create a new pod. If you port forward this newly created pod, the expected homepage of Hello Octant! should be visible.
Updating a ConfigMap
Let’s update index.html in the ConfigMap and apply the changes.
...
  index.html: |
        Hello Octant v1!
...
A developer unfamiliar with Kubernetes might expect the deployment to use the new ConfigMap; however, this is not the case. We can verify the old index.html is in use if we port forward the existing pod. Try navigating into the nginx deployment, then edit the configuration to increase the number of replicas. The new pods created will use an updated ConfigMap, which can be confirmed via port forwarding.
Octant provides various features designed to be used together to understand workflows on a cluster. In this scenario, you’ve used a number of debugging features with minimal knowledge of kubectl as a way to understand potentially counterintuitive behaviors.
As you grow and add opinionated tooling into scope, Octant can continue providing value through an extensible plugin system as a toolbox for the growing ecosystem.